


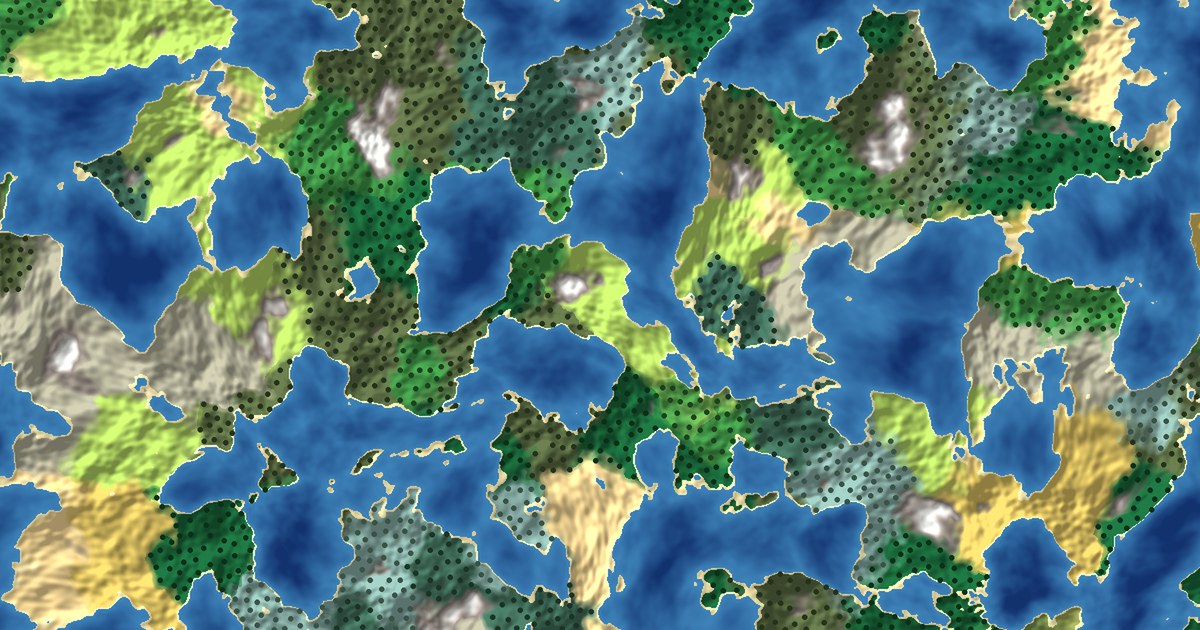
A height map tells you where the land is. It can’t tell you where the desert ends and the rainforest begins. That’s the job of procedural biome generation: turning a few layers of noise into a world with climates, regions and borders that make sense.
Our Perlin noise tutorial ended with a heading, “From Height Maps to Living Worlds,” and this tutorial keeps that promise. Hytale, which entered early access on January 13, 2026, builds its terrain from the same parts we’ll use: Simplex noise, cell noise and warps, wired together as nodes. Its official world-generation docs note that the node editor “does not support noise visualization” yet. So we’ll build those building blocks ourselves and see every one of them.
Here’s the plan: Simplex noise, domain warping, a climate-driven biome table, Voronoi regions with blended borders, and a density stack that chains them all together. By the end, you’ll be able to generate a seeded biome map in JavaScript, C# or C++, and get the identical world from all three.
What Is Procedural Biome Generation?
Think about how you’d describe a real place. First the shape of the land, then the weather, then what grows there. A desert is a desert because it’s hot and dry, not because someone painted it yellow. Procedural biome generation follows the same order.
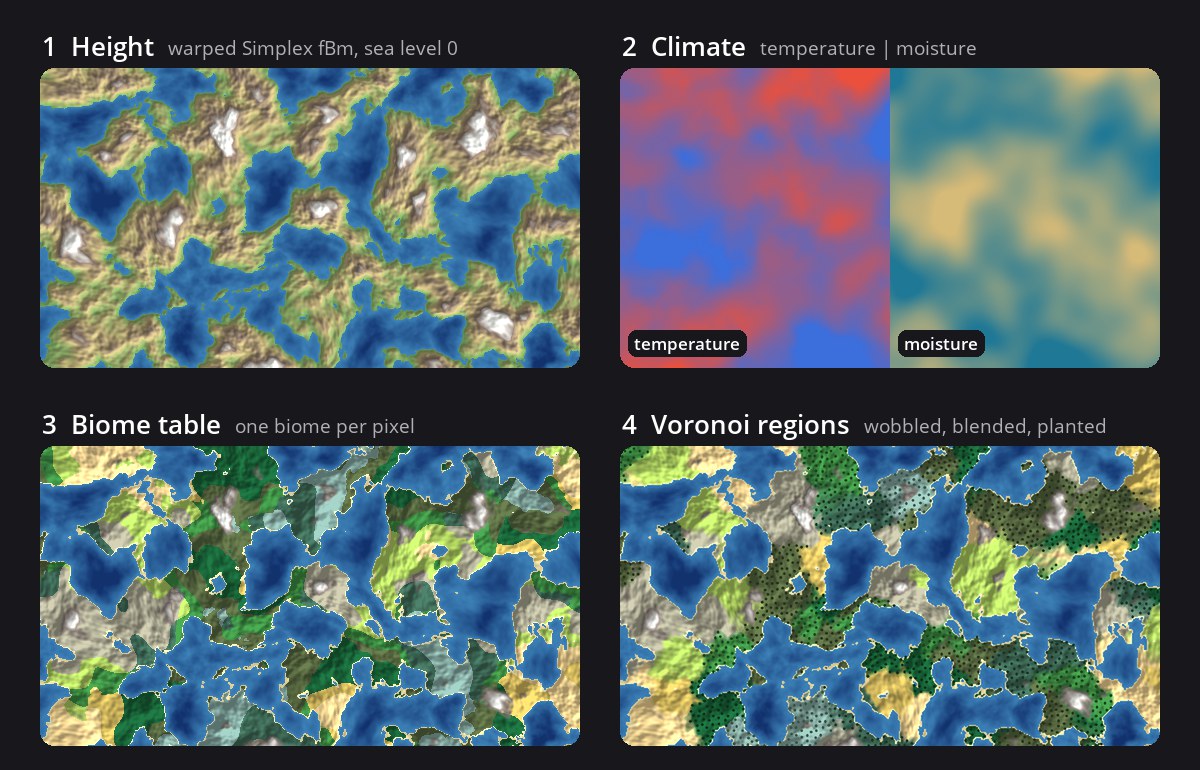
Formally, it’s a pipeline of fields. A field is a function that takes a position and returns a number:
- Height: where the land is. It comes from layered noise (Lab #1), bent by domain warping (Lab #2).
- Climate: a temperature and a moisture value from two more noise layers, with height cooling the peaks.
- Biome lookup: a table that turns (temperature, moisture) into a biome (Lab #3).
- Regions: Voronoi cells that group the map into areas with one biome each, blended at the borders (Lab #4).
- Composition: a stack that wires fields into other fields (Lab #5).
You’ve seen these fields in the real world:
- Mountains are colder: in the standard atmosphere, air cools about 6.5 °C for every kilometer you climb. That’s why Kilimanjaro, about three degrees south of the equator, still has glaciers. Our climate step does the same thing with one subtraction.
- Ecologists already drew the table: Robert Whittaker classified the world’s biomes by average temperature and rainfall. His chart is the ancestor of nearly every biome table in games, ours included.
- Coastlines are fractal: Benoit Mandelbrot’s 1967 paper “How Long Is the Coast of Britain?” showed that coastlines keep adding detail as you zoom in. Stacking noise octaves fakes exactly that.
Why Use Procedural Biomes in Games?
- Worlds that make sense: deserts sit next to savannas, not glaciers, because neighbors share a climate.
- Gameplay zones for free: each Voronoi region is a ready-made quest hub, faction territory or difficulty band.
- Content tables: the biome id picks the enemies, loot, music and ambient sound for every spot on the map.
- One seed, one world: the same seed rebuilds the same map, so players can share worlds and you can reproduce bugs.
- Art direction knobs: move one threshold and the whole world gets drier, colder or greener.
- Infinite and cheap: every field is a function of position, so chunks can generate in any order, on any thread.
Step-by-Step Lab #1: From Perlin to Simplex Noise
Picture two bathroom floors. One is tiled with squares, the other with triangles. Perlin noise lives on the square floor: every point blends the four corners of its tile. Simplex noise lives on the triangle floor: every point adds up just three corners, and each corner’s influence fades out on its own, so there’s nothing left to blend.
Ken Perlin designed simplex noise in 2001 as a faster successor to his classic noise. It also scales better. In N dimensions, simplex noise touches N + 1 corners where Perlin touches 2N: 3 versus 4 in 2D, 4 versus 8 in 3D, 5 versus 16 in 4D.
For years the standard advice was “use OpenSimplex to dodge the patent.” That patent (US 6,867,776, which covered simplex noise in 3D and up for image synthesis) expired on January 8, 2022. OpenSimplex2 is still a good library with its own trade-offs, but you no longer need it to avoid a patent.
Step 1: Build the Simplex Class
The clever part of simplex noise is finding which triangle a point is in. Triangles don’t line up with x and y, so we skew the plane until the triangle grid becomes a square grid. Now a plain floor() finds the cell, one comparison picks which half of the cell (which triangle) we’re in, and we unskew to measure distances. We reuse SeededRandom and the Fisher–Yates shuffle from the Perlin class, so a seed builds the same permutation table in both.
Commented Code
/*
  Step 1: Build the Simplex class
  -------------------------------
  Same recipe as the Perlin class from our Perlin noise tutorial: a seeded, shuffled permutation
  table picks a random gradient at every lattice corner. The difference is the lattice itself.
  Perlin blends the 4 corners of a square; Simplex sums just the 3 corners of a triangle.
*/

// The SeededRandom class from the Perlin tutorial, unchanged: same seed, same sequence.
class SeededRandom {
  constructor(seed) {
    this.seed = seed % 2147483647;
    if (this.seed <= 0) this.seed += 2147483646; // Seeds of 0 or below would break the generator.
  }

  next() {
    return this.seed = this.seed * 16807 % 2147483647;
  }

  nextFloat() {
    return (this.next() - 1) / 2147483646; // 0 (inclusive) to 1 (exclusive)
  }
}

// Skew factors for 2D. F2 squashes the square grid into a grid of rhombuses (two triangles each);
// G2 undoes it. They're the 2D cases of Ken Perlin's formulas (sqrt(n + 1) - 1) / n and (1 - 1/sqrt(n + 1)) / n.
const F2 = 0.5 * (Math.sqrt(3) - 1);
const G2 = (3 - Math.sqrt(3)) / 6;
// 8 gradient directions: 4 diagonals and 4 axes.
const GRAD2 = [[1, 1], [-1, 1], [1, -1], [-1, -1], [1, 0], [-1, 0], [0, 1], [0, -1]];

class Simplex {
  constructor(seed) {
    const random = new SeededRandom(seed);
    const permutation = [];
    for (let i = 0; i < 256; i++) permutation[i] = i;
    // Fisher-Yates shuffle, exactly like the Perlin class, so each seed gives its own table.
    for (let i = 255; i > 0; i--) {
      const j = Math.floor(random.nextFloat() * (i + 1));
      [permutation[i], permutation[j]] = [permutation[j], permutation[i]];
    }
    this.p = permutation.concat(permutation); // Doubled so p[a + p[b]] never runs off the end.
  }

  // One corner's contribution: a smooth bump that fades to 0 at distance sqrt(0.5),
  // multiplied by how far (x, y) points along that corner's gradient.
  corner(hash, x, y) {
    let t = 0.5 - x * x - y * y;
    if (t < 0) return 0; // Too far away: this corner has no say.
    t *= t;
    const g = GRAD2[hash & 7];
    return t * t * (g[0] * x + g[1] * y); // (0.5 - d²)^4 * dot(gradient, offset)
  }

  noise(x, y) {
    // 1. Skew the input so the triangle grid becomes a square grid, and find our cell (i, j).
    const s = (x + y) * F2;
    const i = Math.floor(x + s);
    const j = Math.floor(y + s);
    // 2. Unskew the cell's origin back to normal space and measure our offset from it.
    const t = (i + j) * G2;
    const x0 = x - (i - t);
    const y0 = y - (j - t);

    // 3. Each skewed square holds two triangles. x0 > y0 means the lower one,
    //    so the middle corner is one step right; otherwise it's one step up.
    const i1 = x0 > y0 ? 1 : 0;
    const j1 = x0 > y0 ? 0 : 1;
    const x1 = x0 - i1 + G2; // Offset to the middle corner
    const y1 = y0 - j1 + G2;
    const x2 = x0 - 1 + 2 * G2; // Offset to the far corner
    const y2 = y0 - 1 + 2 * G2;

    // 4. Hash each corner into the permutation table and add up the three contributions.
    const ii = i & 255;
    const jj = j & 255;
    const n0 = this.corner(this.p[ii + this.p[jj]], x0, y0);
    const n1 = this.corner(this.p[ii + i1 + this.p[jj + j1]], x1, y1);
    const n2 = this.corner(this.p[ii + 1 + this.p[jj + 1]], x2, y2);
    return 70 * (n0 + n1 + n2); // 70 scales the result to roughly -1..1
  }
}
/*
  Explanation:
  - Perlin's 2D noise looks at 4 corners and needs 3 smooth interpolations to blend them.
    Simplex looks at 3 corners and just adds them up, each one fading out on its own.
  - Usage: const simplex = new Simplex(123456); simplex.noise(x * 0.01, y * 0.01) returns roughly -1..1.
  Next step: one layer of noise is too smooth for terrain, so we stack octaves.
*/
Uncommented Code
class SeededRandom {
  constructor(seed) {
    this.seed = seed % 2147483647;
    if (this.seed <= 0) this.seed += 2147483646;
  }

  next() {
    return this.seed = this.seed * 16807 % 2147483647;
  }

  nextFloat() {
    return (this.next() - 1) / 2147483646;
  }
}

const F2 = 0.5 * (Math.sqrt(3) - 1);
const G2 = (3 - Math.sqrt(3)) / 6;
const GRAD2 = [[1, 1], [-1, 1], [1, -1], [-1, -1], [1, 0], [-1, 0], [0, 1], [0, -1]];

class Simplex {
  constructor(seed) {
    const random = new SeededRandom(seed);
    const permutation = [];
    for (let i = 0; i < 256; i++) permutation[i] = i;
    for (let i = 255; i > 0; i--) {
      const j = Math.floor(random.nextFloat() * (i + 1));
      [permutation[i], permutation[j]] = [permutation[j], permutation[i]];
    }
    this.p = permutation.concat(permutation);
  }

  corner(hash, x, y) {
    let t = 0.5 - x * x - y * y;
    if (t < 0) return 0;
    t *= t;
    const g = GRAD2[hash & 7];
    return t * t * (g[0] * x + g[1] * y);
  }

  noise(x, y) {
    const s = (x + y) * F2;
    const i = Math.floor(x + s);
    const j = Math.floor(y + s);
    const t = (i + j) * G2;
    const x0 = x - (i - t);
    const y0 = y - (j - t);

    const i1 = x0 > y0 ? 1 : 0;
    const j1 = x0 > y0 ? 0 : 1;
    const x1 = x0 - i1 + G2;
    const y1 = y0 - j1 + G2;
    const x2 = x0 - 1 + 2 * G2;
    const y2 = y0 - 1 + 2 * G2;

    const ii = i & 255;
    const jj = j & 255;
    const n0 = this.corner(this.p[ii + this.p[jj]], x0, y0);
    const n1 = this.corner(this.p[ii + i1 + this.p[jj + j1]], x1, y1);
    const n2 = this.corner(this.p[ii + 1 + this.p[jj + 1]], x2, y2);
    return 70 * (n0 + n1 + n2);
  }
}
Commented Code
// Step 1: Build the Simplex class
// -------------------------------
// Same recipe as the Perlin class from our Perlin noise tutorial: a seeded, shuffled permutation
// table picks a random gradient at every lattice corner. The difference is the lattice itself.
// Perlin blends the 4 corners of a square; Simplex sums just the 3 corners of a triangle.
// Everything is double (not float) so the output matches the JavaScript version bit for bit.

// The SeededRandom class from the Perlin tutorial, unchanged: same seed, same sequence.
public class SeededRandom
{
    private long seed;
    private const long a = 16807;
    private const long c = 0;
    private const long m = 2147483647;

    public SeededRandom(int seed)
    {
        this.seed = seed % m;
        if (this.seed <= 0) this.seed += m - 1; // Seeds of 0 or below would break the generator.
    }

    public int Next()
    {
        seed = (a * seed + c) % m;
        return (int)seed;
    }

    public double NextFloat()
    {
        return (Next() - 1) / (double)(m - 1); // 0 (inclusive) to 1 (exclusive)
    }
}

public class Simplex
{
    // Skew factors for 2D. F2 squashes the square grid into a grid of rhombuses (two triangles each);
    // G2 undoes it. They're the 2D cases of Ken Perlin's formulas (sqrt(n + 1) - 1) / n and (1 - 1/sqrt(n + 1)) / n.
    private static readonly double F2 = 0.5 * (Math.Sqrt(3) - 1);
    private static readonly double G2 = (3 - Math.Sqrt(3)) / 6;
    // 8 gradient directions: 4 diagonals and 4 axes.
    private static readonly int[,] Grad2 = { { 1, 1 }, { -1, 1 }, { 1, -1 }, { -1, -1 }, { 1, 0 }, { -1, 0 }, { 0, 1 }, { 0, -1 } };
    private readonly int[] p = new int[512];

    public Simplex(int seed)
    {
        var random = new SeededRandom(seed);
        int[] permutation = new int[256];
        for (int i = 0; i < 256; i++) permutation[i] = i;
        // Fisher-Yates shuffle, exactly like the Perlin class, so each seed gives its own table.
        for (int i = 255; i > 0; i--)
        {
            int j = (int)(random.NextFloat() * (i + 1));
            (permutation[i], permutation[j]) = (permutation[j], permutation[i]);
        }
        // Doubled so p[a + p[b]] never runs off the end.
        for (int i = 0; i < 512; i++) p[i] = permutation[i & 255];
    }

    // One corner's contribution: a smooth bump that fades to 0 at distance sqrt(0.5),
    // multiplied by how far (x, y) points along that corner's gradient.
    private static double Corner(int hash, double x, double y)
    {
        double t = 0.5 - x * x - y * y;
        if (t < 0) return 0; // Too far away: this corner has no say.
        t *= t;
        int g = hash & 7;
        return t * t * (Grad2[g, 0] * x + Grad2[g, 1] * y); // (0.5 - d²)^4 * dot(gradient, offset)
    }

    public double Noise(double x, double y)
    {
        // 1. Skew the input so the triangle grid becomes a square grid, and find our cell (i, j).
        double s = (x + y) * F2;
        int i = (int)Math.Floor(x + s);
        int j = (int)Math.Floor(y + s);
        // 2. Unskew the cell's origin back to normal space and measure our offset from it.
        double t = (i + j) * G2;
        double x0 = x - (i - t);
        double y0 = y - (j - t);

        // 3. Each skewed square holds two triangles. x0 > y0 means the lower one,
        //    so the middle corner is one step right; otherwise it's one step up.
        int i1 = x0 > y0 ? 1 : 0;
        int j1 = x0 > y0 ? 0 : 1;
        double x1 = x0 - i1 + G2; // Offset to the middle corner
        double y1 = y0 - j1 + G2;
        double x2 = x0 - 1 + 2 * G2; // Offset to the far corner
        double y2 = y0 - 1 + 2 * G2;

        // 4. Hash each corner into the permutation table and add up the three contributions.
        int ii = i & 255;
        int jj = j & 255;
        double n0 = Corner(p[ii + p[jj]], x0, y0);
        double n1 = Corner(p[ii + i1 + p[jj + j1]], x1, y1);
        double n2 = Corner(p[ii + 1 + p[jj + 1]], x2, y2);
        return 70 * (n0 + n1 + n2); // 70 scales the result to roughly -1..1
    }
}

// Usage: var simplex = new Simplex(123456); simplex.Noise(x * 0.01, y * 0.01) returns roughly -1..1.
// In Unity, cast to float at the end: (float)simplex.Noise(...).
Uncommented Code
public class SeededRandom
{
    private long seed;
    private const long a = 16807;
    private const long c = 0;
    private const long m = 2147483647;

    public SeededRandom(int seed)
    {
        this.seed = seed % m;
        if (this.seed <= 0) this.seed += m - 1;
    }

    public int Next()
    {
        seed = (a * seed + c) % m;
        return (int)seed;
    }

    public double NextFloat()
    {
        return (Next() - 1) / (double)(m - 1);
    }
}

public class Simplex
{
    private static readonly double F2 = 0.5 * (Math.Sqrt(3) - 1);
    private static readonly double G2 = (3 - Math.Sqrt(3)) / 6;
    private static readonly int[,] Grad2 = { { 1, 1 }, { -1, 1 }, { 1, -1 }, { -1, -1 }, { 1, 0 }, { -1, 0 }, { 0, 1 }, { 0, -1 } };
    private readonly int[] p = new int[512];

    public Simplex(int seed)
    {
        var random = new SeededRandom(seed);
        int[] permutation = new int[256];
        for (int i = 0; i < 256; i++) permutation[i] = i;
        for (int i = 255; i > 0; i--)
        {
            int j = (int)(random.NextFloat() * (i + 1));
            (permutation[i], permutation[j]) = (permutation[j], permutation[i]);
        }
        for (int i = 0; i < 512; i++) p[i] = permutation[i & 255];
    }

    private static double Corner(int hash, double x, double y)
    {
        double t = 0.5 - x * x - y * y;
        if (t < 0) return 0;
        t *= t;
        int g = hash & 7;
        return t * t * (Grad2[g, 0] * x + Grad2[g, 1] * y);
    }

    public double Noise(double x, double y)
    {
        double s = (x + y) * F2;
        int i = (int)Math.Floor(x + s);
        int j = (int)Math.Floor(y + s);
        double t = (i + j) * G2;
        double x0 = x - (i - t);
        double y0 = y - (j - t);

        int i1 = x0 > y0 ? 1 : 0;
        int j1 = x0 > y0 ? 0 : 1;
        double x1 = x0 - i1 + G2;
        double y1 = y0 - j1 + G2;
        double x2 = x0 - 1 + 2 * G2;
        double y2 = y0 - 1 + 2 * G2;

        int ii = i & 255;
        int jj = j & 255;
        double n0 = Corner(p[ii + p[jj]], x0, y0);
        double n1 = Corner(p[ii + i1 + p[jj + j1]], x1, y1);
        double n2 = Corner(p[ii + 1 + p[jj + 1]], x2, y2);
        return 70 * (n0 + n1 + n2);
    }
}
Commented Code
// Step 1: Build the Simplex class
// -------------------------------
// Same recipe as the Perlin class from our Perlin noise tutorial: a seeded, shuffled permutation
// table picks a random gradient at every lattice corner. The difference is the lattice itself.
// Perlin blends the 4 corners of a square; Simplex sums just the 3 corners of a triangle.
// Everything is double (not float) so the output can match the JavaScript version bit for bit.
#include <algorithm>
#include <cmath>
#include <vector>

// The SeededRandom class from the Perlin tutorial, unchanged: same seed, same sequence.
class SeededRandom {
private:
  long long seed;
  static const long long a = 16807;
  static const long long c = 0;
  static const long long m = 2147483647;

public:
  SeededRandom(int seed) : seed(seed % m) {
    if (this->seed <= 0) this->seed += m - 1;  // Seeds of 0 or below would break the generator.
  }

  int Next() {
    seed = (a * seed + c) % m;
    return static_cast<int>(seed);
  }

  double NextFloat() { return (Next() - 1) / static_cast<double>(m - 1); }  // 0 (inclusive) to 1 (exclusive)
};

class Simplex {
private:
  std::vector<int> p;

  // One corner's contribution: a smooth bump that fades to 0 at distance sqrt(0.5),
  // multiplied by how far (x, y) points along that corner's gradient.
  static double Corner(int hash, double x, double y) {
    // 8 gradient directions: 4 diagonals and 4 axes.
    static const int grad2[8][2] = {{1, 1}, {-1, 1}, {1, -1}, {-1, -1}, {1, 0}, {-1, 0}, {0, 1}, {0, -1}};
    double t = 0.5 - x * x - y * y;
    if (t < 0) return 0;  // Too far away: this corner has no say.
    t *= t;
    const int* g = grad2[hash & 7];
    return t * t * (g[0] * x + g[1] * y);  // (0.5 - d^2)^4 * dot(gradient, offset)
  }

public:
  Simplex(int seed) : p(512) {
    SeededRandom random(seed);
    std::vector<int> permutation(256);
    for (int i = 0; i < 256; i++) permutation[i] = i;
    // Fisher-Yates shuffle, exactly like the Perlin class, so each seed gives its own table.
    for (int i = 255; i > 0; i--) {
      int j = static_cast<int>(random.NextFloat() * (i + 1));
      std::swap(permutation[i], permutation[j]);
    }
    // Doubled so p[a + p[b]] never runs off the end.
    for (int i = 0; i < 512; i++) p[i] = permutation[i & 255];
  }

  double Noise(double x, double y) const {
    // Skew factors for 2D. F2 squashes the square grid into a grid of rhombuses (two triangles each);
    // G2 undoes it. They're the 2D cases of Ken Perlin's formulas (sqrt(n + 1) - 1) / n and (1 - 1/sqrt(n + 1)) / n.
    static const double F2 = 0.5 * (std::sqrt(3.0) - 1);
    static const double G2 = (3 - std::sqrt(3.0)) / 6;
    // 1. Skew the input so the triangle grid becomes a square grid, and find our cell (i, j).
    double s = (x + y) * F2;
    int i = static_cast<int>(std::floor(x + s));
    int j = static_cast<int>(std::floor(y + s));
    // 2. Unskew the cell's origin back to normal space and measure our offset from it.
    double t = (i + j) * G2;
    double x0 = x - (i - t);
    double y0 = y - (j - t);

    // 3. Each skewed square holds two triangles. x0 > y0 means the lower one,
    //    so the middle corner is one step right; otherwise it's one step up.
    int i1 = x0 > y0 ? 1 : 0;
    int j1 = x0 > y0 ? 0 : 1;
    double x1 = x0 - i1 + G2;  // Offset to the middle corner
    double y1 = y0 - j1 + G2;
    double x2 = x0 - 1 + 2 * G2;  // Offset to the far corner
    double y2 = y0 - 1 + 2 * G2;

    // 4. Hash each corner into the permutation table and add up the three contributions.
    int ii = i & 255;
    int jj = j & 255;
    double n0 = Corner(p[ii + p[jj]], x0, y0);
    double n1 = Corner(p[ii + i1 + p[jj + j1]], x1, y1);
    double n2 = Corner(p[ii + 1 + p[jj + 1]], x2, y2);
    return 70 * (n0 + n1 + n2);  // 70 scales the result to roughly -1..1
  }
};

// Usage: Simplex simplex(123456); simplex.Noise(x * 0.01, y * 0.01) returns roughly -1..1.
// Bit-identical to the JavaScript and C# versions when built with -ffp-contract=off (GCC/Clang).
// Without it, the compiler may fuse a * b + c into one instruction and the last digits can differ.
Uncommented Code
#include <algorithm>
#include <cmath>
#include <vector>

class SeededRandom {
private:
  long long seed;
  static const long long a = 16807;
  static const long long c = 0;
  static const long long m = 2147483647;

public:
  SeededRandom(int seed) : seed(seed % m) {
    if (this->seed <= 0) this->seed += m - 1;
  }

  int Next() {
    seed = (a * seed + c) % m;
    return static_cast<int>(seed);
  }

  double NextFloat() { return (Next() - 1) / static_cast<double>(m - 1); }
};

class Simplex {
private:
  std::vector<int> p;

  static double Corner(int hash, double x, double y) {
    static const int grad2[8][2] = {{1, 1}, {-1, 1}, {1, -1}, {-1, -1}, {1, 0}, {-1, 0}, {0, 1}, {0, -1}};
    double t = 0.5 - x * x - y * y;
    if (t < 0) return 0;
    t *= t;
    const int* g = grad2[hash & 7];
    return t * t * (g[0] * x + g[1] * y);
  }

public:
  Simplex(int seed) : p(512) {
    SeededRandom random(seed);
    std::vector<int> permutation(256);
    for (int i = 0; i < 256; i++) permutation[i] = i;
    for (int i = 255; i > 0; i--) {
      int j = static_cast<int>(random.NextFloat() * (i + 1));
      std::swap(permutation[i], permutation[j]);
    }
    for (int i = 0; i < 512; i++) p[i] = permutation[i & 255];
  }

  double Noise(double x, double y) const {
    static const double F2 = 0.5 * (std::sqrt(3.0) - 1);
    static const double G2 = (3 - std::sqrt(3.0)) / 6;
    double s = (x + y) * F2;
    int i = static_cast<int>(std::floor(x + s));
    int j = static_cast<int>(std::floor(y + s));
    double t = (i + j) * G2;
    double x0 = x - (i - t);
    double y0 = y - (j - t);

    int i1 = x0 > y0 ? 1 : 0;
    int j1 = x0 > y0 ? 0 : 1;
    double x1 = x0 - i1 + G2;
    double y1 = y0 - j1 + G2;
    double x2 = x0 - 1 + 2 * G2;
    double y2 = y0 - 1 + 2 * G2;

    int ii = i & 255;
    int jj = j & 255;
    double n0 = Corner(p[ii + p[jj]], x0, y0);
    double n1 = Corner(p[ii + i1 + p[jj + j1]], x1, y1);
    double n2 = Corner(p[ii + 1 + p[jj + 1]], x2, y2);
    return 70 * (n0 + n1 + n2);
  }
};
// Step 1: Build the Simplex class
// Same seeded, shuffled permutation table as the Perlin class. Instead of blending the
// 4 corners of a square, Simplex adds up the 3 corners of a triangle.

CLASS SeededRandom                       // Unchanged from the Perlin tutorial
  METHOD constructor(seed)
    this.seed = seed MOD 2147483647
    IF this.seed <= 0 THEN this.seed = this.seed + 2147483646 END IF
  END METHOD
  METHOD next()
    this.seed = (this.seed * 16807) MOD 2147483647
    RETURN this.seed
  END METHOD
  METHOD nextFloat()
    RETURN (this.next() - 1) / 2147483646   // 0 (inclusive) to 1 (exclusive)
  END METHOD
END CLASS

DECLARE F2 = 0.5 * (SQRT(3) - 1)        // Skews the square grid into rhombuses (two triangles each)
DECLARE G2 = (3 - SQRT(3)) / 6          // Unskews back to normal space
DECLARE GRAD2 = [[1,1], [-1,1], [1,-1], [-1,-1], [1,0], [-1,0], [0,1], [0,-1]]

CLASS Simplex
  METHOD constructor(seed)
    DECLARE random = NEW SeededRandom(seed)
    DECLARE permutation = [0, 1, 2, ..., 255]
    FOR i FROM 255 DOWNTO 1 DO                       // Fisher-Yates shuffle, same as Perlin
      DECLARE j = FLOOR(random.nextFloat() * (i + 1))
      SWAP permutation[i] WITH permutation[j]
    END FOR
    this.p = permutation CONCATENATED WITH permutation   // 512 entries, so lookups never overflow
  END METHOD

  // One corner's contribution: a bump that fades to 0 at distance SQRT(0.5),
  // times the dot product of the corner's gradient with the offset (x, y)
  METHOD corner(hash, x, y)
    DECLARE t = 0.5 - x * x - y * y
    IF t < 0 THEN RETURN 0 END IF
    DECLARE g = GRAD2[hash AND 7]
    RETURN t * t * t * t * (g[0] * x + g[1] * y)
  END METHOD

  METHOD noise(x, y)
    // 1. Skew, and find the cell (i, j) in the skewed grid
    DECLARE s = (x + y) * F2
    DECLARE i = FLOOR(x + s)
    DECLARE j = FLOOR(y + s)
    // 2. Offset from the cell's first corner, in normal space
    DECLARE t = (i + j) * G2
    DECLARE x0 = x - (i - t)
    DECLARE y0 = y - (j - t)
    // 3. Lower triangle (x0 > y0): middle corner is one step right; upper: one step up
    DECLARE i1 = 1 IF x0 > y0 ELSE 0
    DECLARE j1 = 0 IF x0 > y0 ELSE 1
    DECLARE x1 = x0 - i1 + G2,     y1 = y0 - j1 + G2
    DECLARE x2 = x0 - 1 + 2 * G2,  y2 = y0 - 1 + 2 * G2
    // 4. Hash the three corners and add up their contributions
    DECLARE ii = i AND 255
    DECLARE jj = j AND 255
    DECLARE n0 = this.corner(this.p[ii + this.p[jj]], x0, y0)
    DECLARE n1 = this.corner(this.p[ii + i1 + this.p[jj + j1]], x1, y1)
    DECLARE n2 = this.corner(this.p[ii + 1 + this.p[jj + 1]], x2, y2)
    RETURN 70 * (n0 + n1 + n2)          // Roughly -1..1
  END METHOD
END CLASS
Step 2: Stack Octaves into fBm
One layer of noise gives you smooth blobs. Real terrain has detail at every scale: continents, bays, coves, rocks. Fractal Brownian motion (fBm) adds several layers, or octaves, each with double the frequency and half the strength. It’s the same recipe as fractalNoise() in our Perlin class, including the per-octave offsets.
Commented Code
/*
  Step 2: Stack octaves into fBm
  ------------------------------
  Fractal Brownian motion (fBm) is the same idea as fractalNoise() in our Perlin tutorial:
  add several layers of noise, each at double the frequency and half the strength.
  Big layers make continents, small layers add coastline detail.
*/
function fbm(simplex, x, y, octaves = 4, persistence = 0.5, lacunarity = 2.0) {
  let total = 0;
  let frequency = 1; // How zoomed-in this octave is
  let amplitude = 1; // How much this octave counts
  let maxValue = 0; // The biggest total possible, used to scale back to -1..1
  for (let i = 0; i < octaves; i++) {
    // A different offset per octave, so the layers don't all line up at the origin.
    const offset = i * 2;
    total += simplex.noise((x + offset) * frequency, (y + offset) * frequency) * amplitude;
    maxValue += amplitude;
    amplitude *= persistence; // 0.5: each octave counts half as much...
    frequency *= lacunarity; // 2.0: ...and has twice the detail
  }
  return total / maxValue;
}
/*
  Explanation:
  - Dividing by maxValue keeps the result inside -1..1, but in practice it clusters near 0.
    With 4 octaves, 90% of values land between about -0.47 and 0.47.
    Remember that when you pick thresholds (more in Common Pitfalls).
  Next step: bend the coordinates before we sample them.
*/
Uncommented Code
function fbm(simplex, x, y, octaves = 4, persistence = 0.5, lacunarity = 2.0) {
  let total = 0;
  let frequency = 1;
  let amplitude = 1;
  let maxValue = 0;
  for (let i = 0; i < octaves; i++) {
    const offset = i * 2;
    total += simplex.noise((x + offset) * frequency, (y + offset) * frequency) * amplitude;
    maxValue += amplitude;
    amplitude *= persistence;
    frequency *= lacunarity;
  }
  return total / maxValue;
}
Commented Code
// Step 2: Stack octaves into fBm
// ------------------------------
// Fractal Brownian motion (fBm) is the same idea as FractalNoise() in our Perlin tutorial:
// add several layers of noise, each at double the frequency and half the strength.
// Big layers make continents, small layers add coastline detail.
// The methods from here on are static; put them in any static class (ours is called BiomeGen).

public static double Fbm(Simplex simplex, double x, double y, int octaves = 4, double persistence = 0.5, double lacunarity = 2.0)
{
    double total = 0;
    double frequency = 1; // How zoomed-in this octave is
    double amplitude = 1; // How much this octave counts
    double maxValue = 0; // The biggest total possible, used to scale back to -1..1
    for (int i = 0; i < octaves; i++)
    {
        // A different offset per octave, so the layers don't all line up at the origin.
        int offset = i * 2;
        total += simplex.Noise((x + offset) * frequency, (y + offset) * frequency) * amplitude;
        maxValue += amplitude;
        amplitude *= persistence; // 0.5: each octave counts half as much...
        frequency *= lacunarity; // 2.0: ...and has twice the detail
    }
    return total / maxValue;
}

// Dividing by maxValue keeps the result inside -1..1, but in practice it clusters near 0.
// With 4 octaves, 90% of values land between about -0.47 and 0.47.
Uncommented Code
public static double Fbm(Simplex simplex, double x, double y, int octaves = 4, double persistence = 0.5, double lacunarity = 2.0)
{
    double total = 0;
    double frequency = 1;
    double amplitude = 1;
    double maxValue = 0;
    for (int i = 0; i < octaves; i++)
    {
        int offset = i * 2;
        total += simplex.Noise((x + offset) * frequency, (y + offset) * frequency) * amplitude;
        maxValue += amplitude;
        amplitude *= persistence;
        frequency *= lacunarity;
    }
    return total / maxValue;
}
Commented Code
// Step 2: Stack octaves into fBm
// ------------------------------
// Fractal Brownian motion (fBm) is the same idea as FractalNoise() in our Perlin tutorial:
// add several layers of noise, each at double the frequency and half the strength.
// Big layers make continents, small layers add coastline detail.

double fbm(const Simplex& simplex, double x, double y, int octaves = 4, double persistence = 0.5,
           double lacunarity = 2.0) {
  double total = 0;
  double frequency = 1;  // How zoomed-in this octave is
  double amplitude = 1;  // How much this octave counts
  double maxValue = 0;   // The biggest total possible, used to scale back to -1..1
  for (int i = 0; i < octaves; i++) {
    // A different offset per octave, so the layers don't all line up at the origin.
    int offset = i * 2;
    total += simplex.Noise((x + offset) * frequency, (y + offset) * frequency) * amplitude;
    maxValue += amplitude;
    amplitude *= persistence;  // 0.5: each octave counts half as much...
    frequency *= lacunarity;   // 2.0: ...and has twice the detail
  }
  return total / maxValue;
}

// Dividing by maxValue keeps the result inside -1..1, but in practice it clusters near 0.
// With 4 octaves, 90% of values land between about -0.47 and 0.47.
Uncommented Code
double fbm(const Simplex& simplex, double x, double y, int octaves = 4, double persistence = 0.5,
           double lacunarity = 2.0) {
  double total = 0;
  double frequency = 1;
  double amplitude = 1;
  double maxValue = 0;
  for (int i = 0; i < octaves; i++) {
    int offset = i * 2;
    total += simplex.Noise((x + offset) * frequency, (y + offset) * frequency) * amplitude;
    maxValue += amplitude;
    amplitude *= persistence;
    frequency *= lacunarity;
  }
  return total / maxValue;
}
// Step 2: Stack octaves into fBm
// Same recipe as fractalNoise() in the Perlin tutorial: each octave has double the
// frequency and half the amplitude. Dividing by maxValue keeps the result in -1..1.

FUNCTION fbm(simplex, x, y, octaves = 4, persistence = 0.5, lacunarity = 2.0)
  DECLARE total = 0
  DECLARE frequency = 1
  DECLARE amplitude = 1
  DECLARE maxValue = 0
  FOR i FROM 0 TO octaves - 1 DO
    DECLARE offset = i * 2                       // Keeps octaves from lining up at the origin
    total = total + simplex.noise((x + offset) * frequency, (y + offset) * frequency) * amplitude
    maxValue = maxValue + amplitude
    amplitude = amplitude * persistence
    frequency = frequency * lacunarity
  END FOR
  RETURN total / maxValue                        // In practice, mostly between -0.47 and 0.47
END FUNCTION
Lab: Perlin vs Simplex
👉 Try this: switch to Contours and look at the Perlin side. Many contour lines run straight across, lined up with the cyan square grid. That’s the directional artifact simplex noise was designed to reduce. Then press Race 1M samples. In our test on a Mac (Chromium), Simplex took about 70% of Perlin’s time.
What’s the Difference Between Perlin and Simplex Noise?
- Grid: Perlin uses squares (cubes in 3D); Simplex uses triangles (tetrahedra in 3D), the simplest shape that tiles each dimension.
- Work per sample: 4 corners versus 3 in 2D. Our Perlin class is the 3D version, so even at z = 0 it visits 8 corners, which is part of why it lost the race.
- Artifacts: Perlin features tend to line up with the axes. Simplex looks about the same in every direction.
- Range: our Simplex uses more of its −1..1 range. 90% of its values fall within ±0.74, while the Perlin class sampled at z = 0 stays within ±0.42. That’s why the Simplex panel has more contrast.
- Patents: none anymore, as of January 2022.
Step-by-Step Lab #2: Domain Warping
Print a noise texture on a sheet of rubber, then push the rubber around with your thumb before you look at it. The pattern hasn’t changed, but where each part lands has. Domain warping does that with math: before sampling the noise at point p, push p by an offset that comes from more noise.
Formally, instead of fbm(p) we compute fbm(p + s · q), where q is a 2D offset made of two fBm samples and s is the strength. Inigo Quilez popularized this in his article on domain warping, which also takes the next step: warp the warp, fbm(p + fbm(p + fbm(p))). Our code follows his version, including his offsets and his default strength of 4.
Step 1: Warp the Coordinates
Pushing a 2D point takes two numbers, so the offset q is built from two fBm samples taken at different offsets. Set levels to 2 for the double warp, where a second offset is sampled at the already-pushed point.
Commented Code
/*
  Step 1: Warp the coordinates
  ----------------------------
  Domain warping samples the noise somewhere *other* than where you asked: we push the point
  (x, y) by an offset that itself comes from noise. This is Inigo Quilez's fbm(p + fbm(p)).
*/
function domainWarp(simplex, x, y, strength = 4, frequency = 1, levels = 1) {
  let qx = 0;
  let qy = 0;
  if (levels >= 1) {
    // q is a 2D offset built from two fBm samples. The (5.2, 1.3) shift just makes
    // the y-sample different from the x-sample; any unrelated numbers work.
    qx = fbm(simplex, x * frequency, y * frequency);
    qy = fbm(simplex, x * frequency + 5.2, y * frequency + 1.3);
  }
  if (levels >= 2) {
    // Double warp: warp the warp. r is sampled at a point that q has already pushed.
    const px = (x + strength * qx) * frequency;
    const py = (y + strength * qy) * frequency;
    const rx = fbm(simplex, px + 1.7, py + 9.2);
    const ry = fbm(simplex, px + 8.3, py + 2.8);
    qx = rx;
    qy = ry;
  }
  // levels 0: fbm(p)    levels 1: fbm(p + 4q)    levels 2: fbm(p + 4r)
  return fbm(simplex, x + strength * qx, y + strength * qy);
}
/*
  Explanation:
  - strength is how far points get pushed (Quilez uses 4). frequency sets the size of the
    bends: low values give long sweeping folds, high values give crinkles.
  - The offsets (5.2, 1.3), (1.7, 9.2), (8.3, 2.8) are the ones from Quilez's article.
  Next step: change the noise's shape, not just its position.
*/
Uncommented Code
function domainWarp(simplex, x, y, strength = 4, frequency = 1, levels = 1) {
  let qx = 0;
  let qy = 0;
  if (levels >= 1) {
    qx = fbm(simplex, x * frequency, y * frequency);
    qy = fbm(simplex, x * frequency + 5.2, y * frequency + 1.3);
  }
  if (levels >= 2) {
    const px = (x + strength * qx) * frequency;
    const py = (y + strength * qy) * frequency;
    const rx = fbm(simplex, px + 1.7, py + 9.2);
    const ry = fbm(simplex, px + 8.3, py + 2.8);
    qx = rx;
    qy = ry;
  }
  return fbm(simplex, x + strength * qx, y + strength * qy);
}
Commented Code
// Step 1: Warp the coordinates
// ----------------------------
// Domain warping samples the noise somewhere *other* than where you asked: we push the point
// (x, y) by an offset that itself comes from noise. This is Inigo Quilez's fbm(p + fbm(p)).

public static double DomainWarp(Simplex simplex, double x, double y, double strength = 4, double frequency = 1, int levels = 1)
{
    double qx = 0;
    double qy = 0;
    if (levels >= 1)
    {
        // q is a 2D offset built from two fBm samples. The (5.2, 1.3) shift just makes
        // the y-sample different from the x-sample; any unrelated numbers work.
        qx = Fbm(simplex, x * frequency, y * frequency);
        qy = Fbm(simplex, x * frequency + 5.2, y * frequency + 1.3);
    }
    if (levels >= 2)
    {
        // Double warp: warp the warp. r is sampled at a point that q has already pushed.
        double px = (x + strength * qx) * frequency;
        double py = (y + strength * qy) * frequency;
        double rx = Fbm(simplex, px + 1.7, py + 9.2);
        double ry = Fbm(simplex, px + 8.3, py + 2.8);
        qx = rx;
        qy = ry;
    }
    // levels 0: fbm(p)    levels 1: fbm(p + 4q)    levels 2: fbm(p + 4r)
    return Fbm(simplex, x + strength * qx, y + strength * qy);
}

// strength is how far points get pushed (Quilez uses 4). frequency sets the size of the bends:
// low values give long sweeping folds, high values give crinkles.
Uncommented Code
public static double DomainWarp(Simplex simplex, double x, double y, double strength = 4, double frequency = 1, int levels = 1)
{
    double qx = 0;
    double qy = 0;
    if (levels >= 1)
    {
        qx = Fbm(simplex, x * frequency, y * frequency);
        qy = Fbm(simplex, x * frequency + 5.2, y * frequency + 1.3);
    }
    if (levels >= 2)
    {
        double px = (x + strength * qx) * frequency;
        double py = (y + strength * qy) * frequency;
        double rx = Fbm(simplex, px + 1.7, py + 9.2);
        double ry = Fbm(simplex, px + 8.3, py + 2.8);
        qx = rx;
        qy = ry;
    }
    return Fbm(simplex, x + strength * qx, y + strength * qy);
}
Commented Code
// Step 1: Warp the coordinates
// ----------------------------
// Domain warping samples the noise somewhere *other* than where you asked: we push the point
// (x, y) by an offset that itself comes from noise. This is Inigo Quilez's fbm(p + fbm(p)).

double domainWarp(const Simplex& simplex, double x, double y, double strength = 4, double frequency = 1,
                  int levels = 1) {
  double qx = 0;
  double qy = 0;
  if (levels >= 1) {
    // q is a 2D offset built from two fBm samples. The (5.2, 1.3) shift just makes
    // the y-sample different from the x-sample; any unrelated numbers work.
    qx = fbm(simplex, x * frequency, y * frequency);
    qy = fbm(simplex, x * frequency + 5.2, y * frequency + 1.3);
  }
  if (levels >= 2) {
    // Double warp: warp the warp. r is sampled at a point that q has already pushed.
    double px = (x + strength * qx) * frequency;
    double py = (y + strength * qy) * frequency;
    double rx = fbm(simplex, px + 1.7, py + 9.2);
    double ry = fbm(simplex, px + 8.3, py + 2.8);
    qx = rx;
    qy = ry;
  }
  // levels 0: fbm(p)    levels 1: fbm(p + 4q)    levels 2: fbm(p + 4r)
  return fbm(simplex, x + strength * qx, y + strength * qy);
}

// strength is how far points get pushed (Quilez uses 4). frequency sets the size of the bends:
// low values give long sweeping folds, high values give crinkles.
Uncommented Code
double domainWarp(const Simplex& simplex, double x, double y, double strength = 4, double frequency = 1,
                  int levels = 1) {
  double qx = 0;
  double qy = 0;
  if (levels >= 1) {
    qx = fbm(simplex, x * frequency, y * frequency);
    qy = fbm(simplex, x * frequency + 5.2, y * frequency + 1.3);
  }
  if (levels >= 2) {
    double px = (x + strength * qx) * frequency;
    double py = (y + strength * qy) * frequency;
    double rx = fbm(simplex, px + 1.7, py + 9.2);
    double ry = fbm(simplex, px + 8.3, py + 2.8);
    qx = rx;
    qy = ry;
  }
  return fbm(simplex, x + strength * qx, y + strength * qy);
}
// Step 1: Warp the coordinates (Inigo Quilez's fbm(p + fbm(p)))
// Push the sample point by an offset that comes from noise, then sample there.

FUNCTION domainWarp(simplex, x, y, strength = 4, frequency = 1, levels = 1)
  DECLARE qx = 0
  DECLARE qy = 0
  IF levels >= 1 THEN
    qx = fbm(simplex, x * frequency, y * frequency)
    qy = fbm(simplex, x * frequency + 5.2, y * frequency + 1.3)   // Shifted: a different sample
  END IF
  IF levels >= 2 THEN                                              // Double warp: warp the warp
    DECLARE px = (x + strength * qx) * frequency
    DECLARE py = (y + strength * qy) * frequency
    DECLARE rx = fbm(simplex, px + 1.7, py + 9.2)
    DECLARE ry = fbm(simplex, px + 8.3, py + 2.8)
    qx = rx
    qy = ry
  END IF
  RETURN fbm(simplex, x + strength * qx, y + strength * qy)
END FUNCTION
Step 2: Reshape It: Ridged and Billow
Warping moves noise around. Shaping changes what it looks like. Taking the absolute value folds the noise at zero, which turns its zero line into a sharp crease. Flip that upside down and the creases become mountain ridges. Hytale’s docs show the same trick: an Absolute node on a Simplex field gives a ridged shape.
Commented Code
/*
  Step 2: Reshape it: ridged and billow
  -------------------------------------
  Taking the absolute value folds the noise at zero. Where the noise crosses 0, you get a sharp
  crease. Flip it upside down and those creases become mountain ridges.
*/

// Ridged: thin sharp crests along the zero line, like mountain ranges or canyons (inverted).
function ridged(value) {
  const r = 1 - Math.abs(value); // 1 on the zero line, falling off on both sides
  return r * r * 2 - 1; // Squaring sharpens the crest; * 2 - 1 maps 0..1 back to -1..1
}

// Billow: rounded, puffy bumps with sharp valleys between them, like dunes or clouds.
function billow(value) {
  return Math.abs(value) * 2 - 1;
}
/*
  Explanation:
  - Both keep the -1..1 range, so you can swap them into any step that expects noise.
  - Apply them per octave inside fbm() for a stronger effect; here we shape the final value
    so the warp and the shape stay separate knobs.
  Next step: noise decides height. Two more layers will decide climate.
*/
Uncommented Code
function ridged(value) {
  const r = 1 - Math.abs(value);
  return r * r * 2 - 1;
}

function billow(value) {
  return Math.abs(value) * 2 - 1;
}
Commented Code
// Step 2: Reshape it: ridged and billow
// -------------------------------------
// Taking the absolute value folds the noise at zero. Where the noise crosses 0, you get a sharp
// crease. Flip it upside down and those creases become mountain ridges.

// Ridged: thin sharp crests along the zero line, like mountain ranges or canyons (inverted).
public static double Ridged(double value)
{
    double r = 1 - Math.Abs(value); // 1 on the zero line, falling off on both sides
    return r * r * 2 - 1; // Squaring sharpens the crest; * 2 - 1 maps 0..1 back to -1..1
}

// Billow: rounded, puffy bumps with sharp valleys between them, like dunes or clouds.
public static double Billow(double value)
{
    return Math.Abs(value) * 2 - 1;
}

// Both keep the -1..1 range, so you can swap them into any step that expects noise.
Uncommented Code
public static double Ridged(double value)
{
    double r = 1 - Math.Abs(value);
    return r * r * 2 - 1;
}

public static double Billow(double value)
{
    return Math.Abs(value) * 2 - 1;
}
Commented Code
// Step 2: Reshape it: ridged and billow
// -------------------------------------
// Taking the absolute value folds the noise at zero. Where the noise crosses 0, you get a sharp
// crease. Flip it upside down and those creases become mountain ridges.

// Ridged: thin sharp crests along the zero line, like mountain ranges or canyons (inverted).
double ridged(double value) {
  double r = 1 - std::abs(value);  // 1 on the zero line, falling off on both sides
  return r * r * 2 - 1;            // Squaring sharpens the crest; * 2 - 1 maps 0..1 back to -1..1
}

// Billow: rounded, puffy bumps with sharp valleys between them, like dunes or clouds.
double billow(double value) { return std::abs(value) * 2 - 1; }

// Both keep the -1..1 range, so you can swap them into any step that expects noise.
Uncommented Code
double ridged(double value) {
  double r = 1 - std::abs(value);
  return r * r * 2 - 1;
}

double billow(double value) { return std::abs(value) * 2 - 1; }
// Step 2: Reshape it: ridged and billow
// ABS() folds the noise at zero, which turns its zero line into a sharp crease.

FUNCTION ridged(value)                    // Sharp crests: mountain ridges
  DECLARE r = 1 - ABS(value)
  RETURN r * r * 2 - 1                    // Still -1..1
END FUNCTION

FUNCTION billow(value)                    // Puffy bumps: dunes, clouds
  RETURN ABS(value) * 2 - 1
END FUNCTION
Lab: Domain Warping
👉 Try this: start on None to see plain fBm, then click Single. The same blobs stretch into fjords and swirling coastlines. Tick Show warp to see which way each point gets pushed. Now click Double and drag Strength to 6: the map dissolves into static. That’s the first pitfall at the end of this tutorial. Finally try Ridged with a single warp for winding mountain ranges.
Key Parameters
- Strength: how far points get pushed, in noise units. Around 0.5 to 1.5 bends coastlines; 3 and up turns terrain into marble.
- Frequency: the size of the bends. Values below 1 give sweeping, continent-sized folds; values above 1 crinkle the edges.
- Levels: one warp is usually plenty for terrain. Two is for alien worlds, lava flows and marble.
- Shape: Normal for rolling land, Ridged for mountain ranges (or canyons, if you flip it), Billow for dunes and clouds.
Step-by-Step Lab #3: Temperature × Moisture → Biomes
A biome is an address on a climate map: how hot is it, and how wet? Give every point on the map those two numbers and you can look the biome up in a table, the way ecologists do.
Step 1: Two More Noise Layers: Heat and Moisture
Temperature and moisture each get their own Simplex instance, built from the world seed plus a small offset, so the three layers don’t line up. Climate should change over whole regions, so it uses fewer octaves and a lower frequency than height. Then one subtraction makes mountains cold: above sea level, temperature drops by height * chill.
Commented Code
/*
  Step 1: Two more noise layers: heat and moisture
  ------------------------------------------------
  Biomes depend on climate, so every point gets a temperature and a moisture value, each from
  its own Simplex instance (its own seed). Height chills the temperature, so peaks get snow.
*/
function clamp01(value) {
  return Math.min(1, Math.max(0, value));
}

function climateAt(heatNoise, wetNoise, x, y, height, chill = 0.5) {
  // Only 3 octaves: climate should change slowly, over whole regions.
  let temperature = 0.5 + fbm(heatNoise, x, y, 3);
  // Above sea level (height > 0), temperature drops by height * chill.
  if (height > 0) temperature -= height * chill;
  const moisture = 0.5 + fbm(wetNoise, x, y, 3);
  return { temperature: clamp01(temperature), moisture: clamp01(moisture) }; // Both 0..1
}
/*
  Explanation:
  - Usage: const heat = new Simplex(seed + 1), wet = new Simplex(seed + 2);
    climateAt(heat, wet, x * 0.004, y * 0.004, height)
  - Use a lower frequency for climate than for height. Biomes that change every few steps
    feel like noise, not geography.
  Next step: turn (temperature, moisture) into a biome.
*/
Uncommented Code
function clamp01(value) {
  return Math.min(1, Math.max(0, value));
}

function climateAt(heatNoise, wetNoise, x, y, height, chill = 0.5) {
  let temperature = 0.5 + fbm(heatNoise, x, y, 3);
  if (height > 0) temperature -= height * chill;
  const moisture = 0.5 + fbm(wetNoise, x, y, 3);
  return { temperature: clamp01(temperature), moisture: clamp01(moisture) };
}
Commented Code
// Step 1: Two more noise layers: heat and moisture
// ------------------------------------------------
// Biomes depend on climate, so every point gets a temperature and a moisture value, each from
// its own Simplex instance (its own seed). Height chills the temperature, so peaks get snow.

public static double Clamp01(double value)
{
    return Math.Min(1, Math.Max(0, value));
}

public static (double Temperature, double Moisture) ClimateAt(Simplex heatNoise, Simplex wetNoise, double x, double y, double height, double chill = 0.5)
{
    // Only 3 octaves: climate should change slowly, over whole regions.
    double temperature = 0.5 + Fbm(heatNoise, x, y, 3);
    // Above sea level (height > 0), temperature drops by height * chill.
    if (height > 0) temperature -= height * chill;
    double moisture = 0.5 + Fbm(wetNoise, x, y, 3);
    return (Clamp01(temperature), Clamp01(moisture)); // Both 0..1
}

// Usage: var heat = new Simplex(seed + 1); var wet = new Simplex(seed + 2);
//        var climate = BiomeGen.ClimateAt(heat, wet, x * 0.004, y * 0.004, height);
Uncommented Code
public static double Clamp01(double value)
{
    return Math.Min(1, Math.Max(0, value));
}

public static (double Temperature, double Moisture) ClimateAt(Simplex heatNoise, Simplex wetNoise, double x, double y, double height, double chill = 0.5)
{
    double temperature = 0.5 + Fbm(heatNoise, x, y, 3);
    if (height > 0) temperature -= height * chill;
    double moisture = 0.5 + Fbm(wetNoise, x, y, 3);
    return (Clamp01(temperature), Clamp01(moisture));
}
Commented Code
// Step 1: Two more noise layers: heat and moisture
// ------------------------------------------------
// Biomes depend on climate, so every point gets a temperature and a moisture value, each from
// its own Simplex instance (its own seed). Height chills the temperature, so peaks get snow.

struct Climate {
  double temperature;  // 0 (frozen) to 1 (scorching)
  double moisture;     // 0 (bone dry) to 1 (soaked)
};

double clamp01(double value) { return std::min(1.0, std::max(0.0, value)); }

Climate climateAt(const Simplex& heatNoise, const Simplex& wetNoise, double x, double y, double height,
                  double chill = 0.5) {
  // Only 3 octaves: climate should change slowly, over whole regions.
  double temperature = 0.5 + fbm(heatNoise, x, y, 3);
  // Above sea level (height > 0), temperature drops by height * chill.
  if (height > 0) temperature -= height * chill;
  double moisture = 0.5 + fbm(wetNoise, x, y, 3);
  return {clamp01(temperature), clamp01(moisture)};
}

// Usage: Simplex heat(seed + 1), wet(seed + 2);
//        Climate c = climateAt(heat, wet, x * 0.004, y * 0.004, height);
Uncommented Code
struct Climate {
  double temperature;
  double moisture;
};

double clamp01(double value) { return std::min(1.0, std::max(0.0, value)); }

Climate climateAt(const Simplex& heatNoise, const Simplex& wetNoise, double x, double y, double height,
                  double chill = 0.5) {
  double temperature = 0.5 + fbm(heatNoise, x, y, 3);
  if (height > 0) temperature -= height * chill;
  double moisture = 0.5 + fbm(wetNoise, x, y, 3);
  return {clamp01(temperature), clamp01(moisture)};
}
// Step 1: Two more noise layers: heat and moisture
// Each comes from its own Simplex instance. Height makes it colder.

FUNCTION clamp01(value)
  RETURN MIN(1, MAX(0, value))
END FUNCTION

FUNCTION climateAt(heatNoise, wetNoise, x, y, height, chill = 0.5)
  DECLARE temperature = 0.5 + fbm(heatNoise, x, y, 3)   // 3 octaves: climate changes slowly
  IF height > 0 THEN
    temperature = temperature - height * chill           // Mountains are cold
  END IF
  DECLARE moisture = 0.5 + fbm(wetNoise, x, y, 3)
  RETURN { temperature: clamp01(temperature), moisture: clamp01(moisture) }
END FUNCTION

// Usage: heat = NEW Simplex(seed + 1), wet = NEW Simplex(seed + 2)
//        climate = climateAt(heat, wet, x * 0.004, y * 0.004, height)
Step 2: The Biome Table
Our table is a 3 × 3 grid in the spirit of Whittaker’s diagram. Temperature picks the row (cold, temperate, hot) and moisture picks the column (dry, medium, wet). The thresholds between rows and columns are the only numbers you need to tune. One honest simplification: Whittaker’s real diagram is triangle-shaped, because cold air can’t hold much moisture, so there are no cold rainforests. Our rectangle leaves it to the noise to keep that corner rare.
Commented Code
/*
  Step 2: The biome table
  -----------------------
  A Whittaker-style lookup: temperature picks the row, moisture picks the column.
  The thresholds are the lines between rows and columns, and they're all you need to edit.
*/

// Row by row: cold (dry -> wet), temperate (dry -> wet), hot (dry -> wet).
const BIOMES = ["Tundra", "Taiga", "Snowy Forest", "Plains", "Forest", "Swamp", "Desert", "Savanna", "Rainforest"];

function pickBiome(temperature, moisture, heatLimits = [0.4, 0.6], wetLimits = [0.4, 0.6]) {
  // Count how many thresholds we're above: that's the row (and then the column).
  let row = 0;
  while (row < heatLimits.length && temperature >= heatLimits[row]) row++;
  let col = 0;
  while (col < wetLimits.length && moisture >= wetLimits[col]) col++;
  return row * (wetLimits.length + 1) + col; // Index into the flattened table
}
/*
  Explanation:
  - pickBiome(0.7, 0.2) returns 6 ("Desert"): hot row, dry column.
  - More thresholds means more rows or columns. Keep BIOMES the same size as the grid.
  - Water and beaches come from height, not climate, so check height first.
  Next step: group the map into regions with Voronoi cells.
*/
Uncommented Code
const BIOMES = ["Tundra", "Taiga", "Snowy Forest", "Plains", "Forest", "Swamp", "Desert", "Savanna", "Rainforest"];

function pickBiome(temperature, moisture, heatLimits = [0.4, 0.6], wetLimits = [0.4, 0.6]) {
  let row = 0;
  while (row < heatLimits.length && temperature >= heatLimits[row]) row++;
  let col = 0;
  while (col < wetLimits.length && moisture >= wetLimits[col]) col++;
  return row * (wetLimits.length + 1) + col;
}
Commented Code
// Step 2: The biome table
// -----------------------
// A Whittaker-style lookup: temperature picks the row, moisture picks the column.
// The thresholds are the lines between rows and columns, and they're all you need to edit.

// Row by row: cold (dry -> wet), temperate (dry -> wet), hot (dry -> wet).
public static readonly string[] Biomes = { "Tundra", "Taiga", "Snowy Forest", "Plains", "Forest", "Swamp", "Desert", "Savanna", "Rainforest" };

public static int PickBiome(double temperature, double moisture, double[] heatLimits = null, double[] wetLimits = null)
{
    // C# can't use an array as a default value, so null means "use 0.4 and 0.6".
    heatLimits ??= new[] { 0.4, 0.6 };
    wetLimits ??= new[] { 0.4, 0.6 };
    // Count how many thresholds we're above: that's the row (and then the column).
    int row = 0;
    while (row < heatLimits.Length && temperature >= heatLimits[row]) row++;
    int col = 0;
    while (col < wetLimits.Length && moisture >= wetLimits[col]) col++;
    return row * (wetLimits.Length + 1) + col; // Index into the flattened table
}

// PickBiome(0.7, 0.2) returns 6 ("Desert"): hot row, dry column.
// Water and beaches come from height, not climate, so check height first.
Uncommented Code
public static readonly string[] Biomes = { "Tundra", "Taiga", "Snowy Forest", "Plains", "Forest", "Swamp", "Desert", "Savanna", "Rainforest" };

public static int PickBiome(double temperature, double moisture, double[] heatLimits = null, double[] wetLimits = null)
{
    heatLimits ??= new[] { 0.4, 0.6 };
    wetLimits ??= new[] { 0.4, 0.6 };
    int row = 0;
    while (row < heatLimits.Length && temperature >= heatLimits[row]) row++;
    int col = 0;
    while (col < wetLimits.Length && moisture >= wetLimits[col]) col++;
    return row * (wetLimits.Length + 1) + col;
}
Commented Code
// Step 2: The biome table
// -----------------------
// A Whittaker-style lookup: temperature picks the row, moisture picks the column.
// The thresholds are the lines between rows and columns, and they're all you need to edit.
#include <string>

// Row by row: cold (dry -> wet), temperate (dry -> wet), hot (dry -> wet).
const std::vector<std::string> BIOMES = {"Tundra", "Taiga",  "Snowy Forest", "Plains",    "Forest",
                                         "Swamp",  "Desert", "Savanna",      "Rainforest"};

int pickBiome(double temperature, double moisture, const std::vector<double>& heatLimits = {0.4, 0.6},
              const std::vector<double>& wetLimits = {0.4, 0.6}) {
  // Count how many thresholds we're above: that's the row (and then the column).
  int row = 0;
  while (row < (int)heatLimits.size() && temperature >= heatLimits[row]) row++;
  int col = 0;
  while (col < (int)wetLimits.size() && moisture >= wetLimits[col]) col++;
  return row * ((int)wetLimits.size() + 1) + col;  // Index into the flattened table
}

// pickBiome(0.7, 0.2) returns 6 ("Desert"): hot row, dry column.
// Water and beaches come from height, not climate, so check height first.
Uncommented Code
#include <string>

const std::vector<std::string> BIOMES = {"Tundra", "Taiga",  "Snowy Forest", "Plains",    "Forest",
                                         "Swamp",  "Desert", "Savanna",      "Rainforest"};

int pickBiome(double temperature, double moisture, const std::vector<double>& heatLimits = {0.4, 0.6},
              const std::vector<double>& wetLimits = {0.4, 0.6}) {
  int row = 0;
  while (row < (int)heatLimits.size() && temperature >= heatLimits[row]) row++;
  int col = 0;
  while (col < (int)wetLimits.size() && moisture >= wetLimits[col]) col++;
  return row * ((int)wetLimits.size() + 1) + col;
}
// Step 2: The biome table (Whittaker-style)
// Temperature picks the row, moisture picks the column.

DECLARE BIOMES = ["Tundra", "Taiga", "Snowy Forest",       // cold:      dry -> wet
                  "Plains", "Forest", "Swamp",             // temperate: dry -> wet
                  "Desert", "Savanna", "Rainforest"]       // hot:       dry -> wet

FUNCTION pickBiome(temperature, moisture, heatLimits = [0.4, 0.6], wetLimits = [0.4, 0.6])
  DECLARE row = 0
  WHILE row < LENGTH(heatLimits) AND temperature >= heatLimits[row] DO
    row = row + 1
  END WHILE
  DECLARE col = 0
  WHILE col < LENGTH(wetLimits) AND moisture >= wetLimits[col] DO
    col = col + 1
  END WHILE
  RETURN row * (LENGTH(wetLimits) + 1) + col             // Index into BIOMES
END FUNCTION
Lab: Climate → Biomes
Each dot in the table is a spot of land on the map. Drag a line through a crowded patch of dots and a whole region changes biome.
👉 Try this: drag the lines in the table. Each dot is a spot of land on the map, so a line moving through a crowded patch of dots flips a whole region. Switch the view to Temperature and raise Mountain chill to 1.5: the peaks turn blue, and back in Biomes view, tundra and snowy forest climb the mountains.
Step-by-Step Lab #4: Voronoi Regions with Blended Edges
Picking a biome for every pixel gives smooth, natural-looking climate zones, which is roughly how Minecraft does it. But games often want regions: named areas with one biome each, where a quest hub, a faction or a boss lair can live. Our Voronoi tutorial built exactly that: scatter sites, and every point belongs to its nearest site.
This time each cell asks the climate at its own site for its biome. The result looks like stained glass, with dead-straight borders. We’ll fix that with two tricks: warp the lookup point (domain warping again) so borders wiggle, and blend the two nearest cells’ colors near each border.
Step 1: Seeded Sites and the Two Nearest
The site generation is the same as the Voronoi tutorial’s, but seeded. To blend, we need more than the nearest site: we also track the second nearest. The difference between the two distances, often written F2 − F1, is zero exactly on a border and grows toward the middle of a cell.
Commented Code
/*
  Step 1: Seeded sites and the two nearest
  ----------------------------------------
  The same site generation as our Voronoi tutorial (random points spread over the map),
  but seeded, so the same seed always gives the same regions.
*/
function makeSites(count, width, height, seed) {
  const random = new SeededRandom(seed);
  const sites = [];
  for (let i = 0; i < count; i++) {
    const x = random.nextFloat() * width;
    const y = random.nextFloat() * height;
    sites.push([x, y]);
  }
  return sites;
}

// Finds the closest site (F1) AND the second closest (F2). F2 - F1 is 0 exactly on a border
// and grows as you move into a cell, so it tells us how close we are to the edge.
function nearestTwo(sites, x, y) {
  let nearest = 0;
  let second = 0;
  let d1 = Infinity;
  let d2 = Infinity;
  for (let i = 0; i < sites.length; i++) {
    const dx = x - sites[i][0];
    const dy = y - sites[i][1];
    const d = Math.sqrt(dx * dx + dy * dy);
    if (d < d1) {
      // New closest: the old closest becomes the runner-up.
      second = nearest;
      d2 = d1;
      nearest = i;
      d1 = d;
    } else if (d < d2) {
      second = i;
      d2 = d;
    }
  }
  return { nearest, second, d1, d2 };
}
/*
  Explanation:
  - This brute-force loop checks every site, which is fine for a few hundred sites.
    For thousands, put the sites in a grid and only check nearby cells.
  - Give each site a biome by sampling the climate at the site itself.
  Next step: make the borders look less like stained glass.
*/
Uncommented Code
function makeSites(count, width, height, seed) {
  const random = new SeededRandom(seed);
  const sites = [];
  for (let i = 0; i < count; i++) {
    const x = random.nextFloat() * width;
    const y = random.nextFloat() * height;
    sites.push([x, y]);
  }
  return sites;
}

function nearestTwo(sites, x, y) {
  let nearest = 0;
  let second = 0;
  let d1 = Infinity;
  let d2 = Infinity;
  for (let i = 0; i < sites.length; i++) {
    const dx = x - sites[i][0];
    const dy = y - sites[i][1];
    const d = Math.sqrt(dx * dx + dy * dy);
    if (d < d1) {
      second = nearest;
      d2 = d1;
      nearest = i;
      d1 = d;
    } else if (d < d2) {
      second = i;
      d2 = d;
    }
  }
  return { nearest, second, d1, d2 };
}
Commented Code
// Step 1: Seeded sites and the two nearest
// ----------------------------------------
// The same site generation as our Voronoi tutorial (random points spread over the map),
// but seeded, so the same seed always gives the same regions.

public static List<(double X, double Y)> MakeSites(int count, double width, double height, int seed)
{
    var random = new SeededRandom(seed);
    var sites = new List<(double X, double Y)>();
    for (int i = 0; i < count; i++)
    {
        double x = random.NextFloat() * width;
        double y = random.NextFloat() * height;
        sites.Add((x, y));
    }
    return sites;
}

// Finds the closest site (F1) AND the second closest (F2). F2 - F1 is 0 exactly on a border
// and grows as you move into a cell, so it tells us how close we are to the edge.
public static (int Nearest, int Second, double D1, double D2) NearestTwo(List<(double X, double Y)> sites, double x, double y)
{
    int nearest = 0;
    int second = 0;
    double d1 = double.PositiveInfinity;
    double d2 = double.PositiveInfinity;
    for (int i = 0; i < sites.Count; i++)
    {
        double dx = x - sites[i].X;
        double dy = y - sites[i].Y;
        double d = Math.Sqrt(dx * dx + dy * dy);
        if (d < d1)
        {
            // New closest: the old closest becomes the runner-up.
            second = nearest;
            d2 = d1;
            nearest = i;
            d1 = d;
        }
        else if (d < d2)
        {
            second = i;
            d2 = d;
        }
    }
    return (nearest, second, d1, d2);
}

// Brute force is fine for a few hundred sites. For thousands, bucket the sites in a grid.
Uncommented Code
public static List<(double X, double Y)> MakeSites(int count, double width, double height, int seed)
{
    var random = new SeededRandom(seed);
    var sites = new List<(double X, double Y)>();
    for (int i = 0; i < count; i++)
    {
        double x = random.NextFloat() * width;
        double y = random.NextFloat() * height;
        sites.Add((x, y));
    }
    return sites;
}

public static (int Nearest, int Second, double D1, double D2) NearestTwo(List<(double X, double Y)> sites, double x, double y)
{
    int nearest = 0;
    int second = 0;
    double d1 = double.PositiveInfinity;
    double d2 = double.PositiveInfinity;
    for (int i = 0; i < sites.Count; i++)
    {
        double dx = x - sites[i].X;
        double dy = y - sites[i].Y;
        double d = Math.Sqrt(dx * dx + dy * dy);
        if (d < d1)
        {
            second = nearest;
            d2 = d1;
            nearest = i;
            d1 = d;
        }
        else if (d < d2)
        {
            second = i;
            d2 = d;
        }
    }
    return (nearest, second, d1, d2);
}
Commented Code
// Step 1: Seeded sites and the two nearest
// ----------------------------------------
// The same site generation as our Voronoi tutorial (random points spread over the map),
// but seeded, so the same seed always gives the same regions.
#include <limits>

struct Site {
  double x;
  double y;
};

std::vector<Site> makeSites(int count, double width, double height, int seed) {
  SeededRandom random(seed);
  std::vector<Site> sites;
  for (int i = 0; i < count; i++) {
    double x = random.NextFloat() * width;
    double y = random.NextFloat() * height;
    sites.push_back({x, y});
  }
  return sites;
}

// The closest site (F1) AND the second closest (F2). F2 - F1 is 0 exactly on a border
// and grows as you move into a cell, so it tells us how close we are to the edge.
struct NearestHit {
  int nearest;
  int second;
  double d1;
  double d2;
};

NearestHit nearestTwo(const std::vector<Site>& sites, double x, double y) {
  int nearest = 0;
  int second = 0;
  double d1 = std::numeric_limits<double>::infinity();
  double d2 = std::numeric_limits<double>::infinity();
  for (int i = 0; i < (int)sites.size(); i++) {
    double dx = x - sites[i].x;
    double dy = y - sites[i].y;
    double d = std::sqrt(dx * dx + dy * dy);
    if (d < d1) {
      // New closest: the old closest becomes the runner-up.
      second = nearest;
      d2 = d1;
      nearest = i;
      d1 = d;
    } else if (d < d2) {
      second = i;
      d2 = d;
    }
  }
  return {nearest, second, d1, d2};
}

// Brute force is fine for a few hundred sites. For thousands, bucket the sites in a grid.
Uncommented Code
#include <limits>

struct Site {
  double x;
  double y;
};

std::vector<Site> makeSites(int count, double width, double height, int seed) {
  SeededRandom random(seed);
  std::vector<Site> sites;
  for (int i = 0; i < count; i++) {
    double x = random.NextFloat() * width;
    double y = random.NextFloat() * height;
    sites.push_back({x, y});
  }
  return sites;
}

struct NearestHit {
  int nearest;
  int second;
  double d1;
  double d2;
};

NearestHit nearestTwo(const std::vector<Site>& sites, double x, double y) {
  int nearest = 0;
  int second = 0;
  double d1 = std::numeric_limits<double>::infinity();
  double d2 = std::numeric_limits<double>::infinity();
  for (int i = 0; i < (int)sites.size(); i++) {
    double dx = x - sites[i].x;
    double dy = y - sites[i].y;
    double d = std::sqrt(dx * dx + dy * dy);
    if (d < d1) {
      second = nearest;
      d2 = d1;
      nearest = i;
      d1 = d;
    } else if (d < d2) {
      second = i;
      d2 = d;
    }
  }
  return {nearest, second, d1, d2};
}
// Step 1: Seeded sites and the two nearest
// Same random sites as the Voronoi tutorial, but from SeededRandom so they're reproducible.

FUNCTION makeSites(count, width, height, seed)
  DECLARE random = NEW SeededRandom(seed)
  DECLARE sites = EMPTY_ARRAY
  FOR i FROM 1 TO count DO
    DECLARE x = random.nextFloat() * width
    DECLARE y = random.nextFloat() * height
    APPEND [x, y] TO sites
  END FOR
  RETURN sites
END FUNCTION

// d1 = distance to the closest site (F1), d2 = to the second closest (F2).
// d2 - d1 is 0 on a border and grows toward the middle of a cell.
FUNCTION nearestTwo(sites, x, y)
  DECLARE nearest = 0, second = 0
  DECLARE d1 = INFINITY, d2 = INFINITY
  FOR i FROM 0 TO LENGTH(sites) - 1 DO
    DECLARE d = SQRT((x - sites[i].x)^2 + (y - sites[i].y)^2)
    IF d < d1 THEN
      second = nearest
      d2 = d1
      nearest = i
      d1 = d
    ELSE IF d < d2 THEN
      second = i
      d2 = d
    END IF
  END FOR
  RETURN { nearest, second, d1, d2 }
END FUNCTION
Step 2: Wobble the Borders and Blend
The wobble is a small domain warp on the lookup point, so borders bend but every cell keeps its site and its biome. The blend uses F2 − F1: the closer a point is to a border, the closer it gets to a 50/50 mix of the two cells.
Commented Code
/*
  Step 2: Wobble the borders and blend
  ------------------------------------
  Two tricks. First, warp the lookup point with noise (domain warping again), so straight
  Voronoi edges become wiggly coastlines. Second, near a border, blend the two biomes.
*/
function cellBlend(sites, simplex, x, y, wobble, blendWidth, frequency = 0.02) {
  // Push the point up to `wobble` pixels before asking which cell it's in.
  const wx = x + wobble * fbm(simplex, x * frequency, y * frequency, 3);
  const wy = y + wobble * fbm(simplex, x * frequency + 5.2, y * frequency + 1.3, 3);
  const { nearest, second, d1, d2 } = nearestTwo(sites, wx, wy);
  // t goes from 0 on the border to 1 once we're blendWidth deeper into the cell.
  const t = blendWidth > 0 ? Math.min(1, (d2 - d1) / blendWidth) : 1;
  // Smoothstep, mapped to 0.5..1: half-and-half on the border, all `nearest` inside.
  const weight = 0.5 + 0.5 * t * t * (3 - 2 * t);
  return { nearest, second, weight };
}
/*
  Explanation:
  - Final color = mix(color of `second`, color of `nearest`, weight). Blend heights the same
    way and a mountain cell won't end in a cliff.
  - wobble 0 and blendWidth 0 give you the classic hard-edged Voronoi map.
  Next step: put every piece into one density stack.
*/
Uncommented Code
function cellBlend(sites, simplex, x, y, wobble, blendWidth, frequency = 0.02) {
  const wx = x + wobble * fbm(simplex, x * frequency, y * frequency, 3);
  const wy = y + wobble * fbm(simplex, x * frequency + 5.2, y * frequency + 1.3, 3);
  const { nearest, second, d1, d2 } = nearestTwo(sites, wx, wy);
  const t = blendWidth > 0 ? Math.min(1, (d2 - d1) / blendWidth) : 1;
  const weight = 0.5 + 0.5 * t * t * (3 - 2 * t);
  return { nearest, second, weight };
}
Commented Code
// Step 2: Wobble the borders and blend
// ------------------------------------
// Two tricks. First, warp the lookup point with noise (domain warping again), so straight
// Voronoi edges become wiggly coastlines. Second, near a border, blend the two biomes.

public static (int Nearest, int Second, double Weight) CellBlend(List<(double X, double Y)> sites, Simplex simplex, double x, double y, double wobble, double blendWidth, double frequency = 0.02)
{
    // Push the point up to `wobble` units before asking which cell it's in.
    double wx = x + wobble * Fbm(simplex, x * frequency, y * frequency, 3);
    double wy = y + wobble * Fbm(simplex, x * frequency + 5.2, y * frequency + 1.3, 3);
    var (nearest, second, d1, d2) = NearestTwo(sites, wx, wy);
    // t goes from 0 on the border to 1 once we're blendWidth deeper into the cell.
    double t = blendWidth > 0 ? Math.Min(1, (d2 - d1) / blendWidth) : 1;
    // Smoothstep, mapped to 0.5..1: half-and-half on the border, all `nearest` inside.
    double weight = 0.5 + 0.5 * t * t * (3 - 2 * t);
    return (nearest, second, weight);
}

// Final color = Color.Lerp(colorOf[second], colorOf[nearest], (float)weight) in Unity.
// wobble 0 and blendWidth 0 give you the classic hard-edged Voronoi map.
Uncommented Code
public static (int Nearest, int Second, double Weight) CellBlend(List<(double X, double Y)> sites, Simplex simplex, double x, double y, double wobble, double blendWidth, double frequency = 0.02)
{
    double wx = x + wobble * Fbm(simplex, x * frequency, y * frequency, 3);
    double wy = y + wobble * Fbm(simplex, x * frequency + 5.2, y * frequency + 1.3, 3);
    var (nearest, second, d1, d2) = NearestTwo(sites, wx, wy);
    double t = blendWidth > 0 ? Math.Min(1, (d2 - d1) / blendWidth) : 1;
    double weight = 0.5 + 0.5 * t * t * (3 - 2 * t);
    return (nearest, second, weight);
}
Commented Code
// Step 2: Wobble the borders and blend
// ------------------------------------
// Two tricks. First, warp the lookup point with noise (domain warping again), so straight
// Voronoi edges become wiggly coastlines. Second, near a border, blend the two biomes.

struct CellSample {
  int nearest;
  int second;
  double weight;  // How much of `nearest` to use: 0.5 on the border, 1 deep inside
};

CellSample cellBlend(const std::vector<Site>& sites, const Simplex& simplex, double x, double y,
                     double wobble, double blendWidth, double frequency = 0.02) {
  // Push the point up to `wobble` units before asking which cell it's in.
  double wx = x + wobble * fbm(simplex, x * frequency, y * frequency, 3);
  double wy = y + wobble * fbm(simplex, x * frequency + 5.2, y * frequency + 1.3, 3);
  NearestHit hit = nearestTwo(sites, wx, wy);
  // t goes from 0 on the border to 1 once we're blendWidth deeper into the cell.
  double t = blendWidth > 0 ? std::min(1.0, (hit.d2 - hit.d1) / blendWidth) : 1;
  // Smoothstep, mapped to 0.5..1: half-and-half on the border, all `nearest` inside.
  double weight = 0.5 + 0.5 * t * t * (3 - 2 * t);
  return {hit.nearest, hit.second, weight};
}

// Final color = lerp(colorOf[second], colorOf[nearest], weight).
// wobble 0 and blendWidth 0 give you the classic hard-edged Voronoi map.
Uncommented Code
struct CellSample {
  int nearest;
  int second;
  double weight;
};

CellSample cellBlend(const std::vector<Site>& sites, const Simplex& simplex, double x, double y,
                     double wobble, double blendWidth, double frequency = 0.02) {
  double wx = x + wobble * fbm(simplex, x * frequency, y * frequency, 3);
  double wy = y + wobble * fbm(simplex, x * frequency + 5.2, y * frequency + 1.3, 3);
  NearestHit hit = nearestTwo(sites, wx, wy);
  double t = blendWidth > 0 ? std::min(1.0, (hit.d2 - hit.d1) / blendWidth) : 1;
  double weight = 0.5 + 0.5 * t * t * (3 - 2 * t);
  return {hit.nearest, hit.second, weight};
}
// Step 2: Wobble the borders and blend
// Warp the lookup point (wiggly borders), then blend the two closest cells near the edge.

FUNCTION cellBlend(sites, simplex, x, y, wobble, blendWidth, frequency = 0.02)
  DECLARE wx = x + wobble * fbm(simplex, x * frequency, y * frequency, 3)
  DECLARE wy = y + wobble * fbm(simplex, x * frequency + 5.2, y * frequency + 1.3, 3)
  DECLARE hit = nearestTwo(sites, wx, wy)
  DECLARE t = 1
  IF blendWidth > 0 THEN
    t = MIN(1, (hit.d2 - hit.d1) / blendWidth)       // 0 on the border, 1 deep inside
  END IF
  DECLARE weight = 0.5 + 0.5 * t * t * (3 - 2 * t)   // Smoothstep from 0.5 to 1
  RETURN { nearest: hit.nearest, second: hit.second, weight }
END FUNCTION

// color = MIX(colorOf[second], colorOf[nearest], weight)
Lab: Voronoi Biome Regions
👉 Try this: set Border wobble and Blend width to 0 for the classic stained-glass map. Raise the wobble to 14 and the borders start to look like natural boundaries. Push Blend width to 30 for soft transitions, then drop Sites to 8 and watch a few huge regions take over the map.
Putting It Together: A Density Stack
Hytale’s world generator describes terrain as a graph of density nodes. Each node is a field: give it a position and it returns a number. The SimplexNoise2D node outputs a value from −1 to 1, PositionsCellNoise measures distance to a field of points, GradientWarp warps one field using another, and Clamp and Mix shape and combine them. You build terrain by plugging nodes into nodes.
Our version is tiny, but it has the same shape. Every node is a function (x, y) => value, and every node except the source takes another node as input. That means you can reorder, remove or repeat them freely.
Commented Code
/*
  Putting it together: density nodes
  ----------------------------------
  Hytale's world generator describes terrain as a graph of "density" nodes. Each node is a
  field: give it a position, get a number. We can do the same thing with plain functions.
  Every node below takes (x, y) and returns a value, so any node can feed any other.
*/

// Source: fBm Simplex noise. scale sets the feature size (0.01 = features about 100 px wide).
function simplexNode(simplex, scale, octaves = 4) {
  return (x, y) => fbm(simplex, x * scale, y * scale, octaves);
}

// Warp: read the input somewhere else. strength is in world units (pixels here).
function warpNode(input, simplex, strength, scale) {
  return (x, y) => input(
    x + strength * fbm(simplex, x * scale, y * scale, 3),
    y + strength * fbm(simplex, x * scale + 5.2, y * scale + 1.3, 3));
}

// Clamp: flatten everything outside low..high (flat sea floors, plateau tops).
function clampNode(input, low, high) {
  return (x, y) => Math.min(high, Math.max(low, input(x, y)));
}

// Cell noise: 1 on each site, falling to -1 at `radius` away. Islands, craters, oases.
function cellNode(sites, radius) {
  return (x, y) => 1 - 2 * Math.min(1, nearestTwo(sites, x, y).d1 / radius);
}

// Mix: blend two fields. amount 0 = all a, 1 = all b.
function mixNode(a, b, amount) {
  return (x, y) => {
    const va = a(x, y);
    return va + (b(x, y) - va) * amount;
  };
}
/*
  Explanation:
  - Chain them like this:
      let terrain = simplexNode(new Simplex(seed), 0.012);
      terrain = warpNode(terrain, new Simplex(seed + 4), 25, 0.006);
      terrain = clampNode(terrain, -0.3, 0.55);
      terrain = mixNode(terrain, cellNode(makeSites(12, 320, 240, seed + 7), 90), 0.35);
      const height = terrain(x, y);
  - Hytale's nodes go further (3D density, caching, many more types), but the idea is the same:
    small fields that plug into each other.
*/
Uncommented Code
function simplexNode(simplex, scale, octaves = 4) {
  return (x, y) => fbm(simplex, x * scale, y * scale, octaves);
}

function warpNode(input, simplex, strength, scale) {
  return (x, y) => input(
    x + strength * fbm(simplex, x * scale, y * scale, 3),
    y + strength * fbm(simplex, x * scale + 5.2, y * scale + 1.3, 3));
}

function clampNode(input, low, high) {
  return (x, y) => Math.min(high, Math.max(low, input(x, y)));
}

function cellNode(sites, radius) {
  return (x, y) => 1 - 2 * Math.min(1, nearestTwo(sites, x, y).d1 / radius);
}

function mixNode(a, b, amount) {
  return (x, y) => {
    const va = a(x, y);
    return va + (b(x, y) - va) * amount;
  };
}
Commented Code
// Putting it together: density nodes
// ----------------------------------
// Hytale's world generator describes terrain as a graph of "density" nodes. Each node is a
// field: give it a position, get a number. In C# a delegate does the same job.
// Every node below takes (x, y) and returns a value, so any node can feed any other.

public delegate double Density(double x, double y);

// Source: fBm Simplex noise. scale sets the feature size (0.01 = features about 100 units wide).
public static Density SimplexNode(Simplex simplex, double scale, int octaves = 4)
{
    return (x, y) => Fbm(simplex, x * scale, y * scale, octaves);
}

// Warp: read the input somewhere else. strength is in world units.
public static Density WarpNode(Density input, Simplex simplex, double strength, double scale)
{
    return (x, y) => input(
        x + strength * Fbm(simplex, x * scale, y * scale, 3),
        y + strength * Fbm(simplex, x * scale + 5.2, y * scale + 1.3, 3));
}

// Clamp: flatten everything outside low..high (flat sea floors, plateau tops).
public static Density ClampNode(Density input, double low, double high)
{
    return (x, y) => Math.Min(high, Math.Max(low, input(x, y)));
}

// Cell noise: 1 on each site, falling to -1 at `radius` away. Islands, craters, oases.
public static Density CellNode(List<(double X, double Y)> sites, double radius)
{
    return (x, y) => 1 - 2 * Math.Min(1, NearestTwo(sites, x, y).D1 / radius);
}

// Mix: blend two fields. amount 0 = all a, 1 = all b.
public static Density MixNode(Density a, Density b, double amount)
{
    return (x, y) =>
    {
        double va = a(x, y);
        return va + (b(x, y) - va) * amount;
    };
}

// Chain them like this:
//     Density terrain = BiomeGen.SimplexNode(new Simplex(seed), 0.012);
//     terrain = BiomeGen.WarpNode(terrain, new Simplex(seed + 4), 25, 0.006);
//     terrain = BiomeGen.ClampNode(terrain, -0.3, 0.55);
//     terrain = BiomeGen.MixNode(terrain, BiomeGen.CellNode(BiomeGen.MakeSites(12, 320, 240, seed + 7), 90), 0.35);
//     double height = terrain(x, y);
Uncommented Code
public delegate double Density(double x, double y);

public static Density SimplexNode(Simplex simplex, double scale, int octaves = 4)
{
    return (x, y) => Fbm(simplex, x * scale, y * scale, octaves);
}

public static Density WarpNode(Density input, Simplex simplex, double strength, double scale)
{
    return (x, y) => input(
        x + strength * Fbm(simplex, x * scale, y * scale, 3),
        y + strength * Fbm(simplex, x * scale + 5.2, y * scale + 1.3, 3));
}

public static Density ClampNode(Density input, double low, double high)
{
    return (x, y) => Math.Min(high, Math.Max(low, input(x, y)));
}

public static Density CellNode(List<(double X, double Y)> sites, double radius)
{
    return (x, y) => 1 - 2 * Math.Min(1, NearestTwo(sites, x, y).D1 / radius);
}

public static Density MixNode(Density a, Density b, double amount)
{
    return (x, y) =>
    {
        double va = a(x, y);
        return va + (b(x, y) - va) * amount;
    };
}
Commented Code
// Putting it together: density nodes
// ----------------------------------
// Hytale's world generator describes terrain as a graph of "density" nodes. Each node is a
// field: give it a position, get a number. In C++ a std::function does the same job.
// Every node below takes (x, y) and returns a value, so any node can feed any other.
#include <functional>

using Density = std::function<double(double, double)>;

// Source: fBm Simplex noise. scale sets the feature size (0.01 = features about 100 units wide).
// Nodes capture their inputs by value ([=]), so they stay valid after the originals go away.
Density simplexNode(Simplex simplex, double scale, int octaves = 4) {
  return [=](double x, double y) { return fbm(simplex, x * scale, y * scale, octaves); };
}

// Warp: read the input somewhere else. strength is in world units.
Density warpNode(Density input, Simplex simplex, double strength, double scale) {
  return [=](double x, double y) {
    return input(x + strength * fbm(simplex, x * scale, y * scale, 3),
                 y + strength * fbm(simplex, x * scale + 5.2, y * scale + 1.3, 3));
  };
}

// Clamp: flatten everything outside low..high (flat sea floors, plateau tops).
Density clampNode(Density input, double low, double high) {
  return [=](double x, double y) { return std::min(high, std::max(low, input(x, y))); };
}

// Cell noise: 1 on each site, falling to -1 at `radius` away. Islands, craters, oases.
Density cellNode(std::vector<Site> sites, double radius) {
  return [=](double x, double y) { return 1 - 2 * std::min(1.0, nearestTwo(sites, x, y).d1 / radius); };
}

// Mix: blend two fields. amount 0 = all a, 1 = all b.
Density mixNode(Density a, Density b, double amount) {
  return [=](double x, double y) {
    double va = a(x, y);
    return va + (b(x, y) - va) * amount;
  };
}

// Chain them like this:
//     Density terrain = simplexNode(Simplex(seed), 0.012);
//     terrain = warpNode(terrain, Simplex(seed + 4), 25, 0.006);
//     terrain = clampNode(terrain, -0.3, 0.55);
//     terrain = mixNode(terrain, cellNode(makeSites(12, 320, 240, seed + 7), 90), 0.35);
//     double height = terrain(x, y);
Uncommented Code
#include <functional>

using Density = std::function<double(double, double)>;

Density simplexNode(Simplex simplex, double scale, int octaves = 4) {
  return [=](double x, double y) { return fbm(simplex, x * scale, y * scale, octaves); };
}

Density warpNode(Density input, Simplex simplex, double strength, double scale) {
  return [=](double x, double y) {
    return input(x + strength * fbm(simplex, x * scale, y * scale, 3),
                 y + strength * fbm(simplex, x * scale + 5.2, y * scale + 1.3, 3));
  };
}

Density clampNode(Density input, double low, double high) {
  return [=](double x, double y) { return std::min(high, std::max(low, input(x, y))); };
}

Density cellNode(std::vector<Site> sites, double radius) {
  return [=](double x, double y) { return 1 - 2 * std::min(1.0, nearestTwo(sites, x, y).d1 / radius); };
}

Density mixNode(Density a, Density b, double amount) {
  return [=](double x, double y) {
    double va = a(x, y);
    return va + (b(x, y) - va) * amount;
  };
}
// Putting it together: density nodes
// A node is a function of position. Nodes take other nodes as input, so they chain.

FUNCTION simplexNode(simplex, scale, octaves = 4)
  RETURN FUNCTION (x, y) RETURN fbm(simplex, x * scale, y * scale, octaves)
END FUNCTION

FUNCTION warpNode(input, simplex, strength, scale)
  RETURN FUNCTION (x, y)
    RETURN input(x + strength * fbm(simplex, x * scale, y * scale, 3),
                 y + strength * fbm(simplex, x * scale + 5.2, y * scale + 1.3, 3))
END FUNCTION

FUNCTION clampNode(input, low, high)
  RETURN FUNCTION (x, y) RETURN MIN(high, MAX(low, input(x, y)))
END FUNCTION

FUNCTION cellNode(sites, radius)                     // 1 at a site, -1 at radius and beyond
  RETURN FUNCTION (x, y) RETURN 1 - 2 * MIN(1, nearestTwo(sites, x, y).d1 / radius)
END FUNCTION

FUNCTION mixNode(a, b, amount)
  RETURN FUNCTION (x, y)
    DECLARE va = a(x, y)
    RETURN va + (b(x, y) - va) * amount
END FUNCTION

// DECLARE terrain = simplexNode(NEW Simplex(seed), 0.012)
// terrain = warpNode(terrain, NEW Simplex(seed + 4), 25, 0.006)
// terrain = clampNode(terrain, -0.3, 0.55)
// terrain = mixNode(terrain, cellNode(makeSites(12, 320, 240, seed + 7), 90), 0.35)
// DECLARE height = terrain(x, y)
Lab: The Density Stack
👉 Try this: untick each node one at a time and watch both its preview and the map. Drag Ceiling down to 0.2 and the mountains become flat-topped mesas; drag Floor toward 0 and the deep ocean flattens into shallows. Set Cell blend to 1 and the map turns into round islands, one per cell site. The code line under the map updates as you go, so you can paste your stack straight into your own project.
Common Pitfalls
- Warps that blow up: every warp level stretches the noise by roughly (1 + strength × the warp field’s slope), and a double warp stretches the stretched result. At the warp lab’s zoom, plain fBm changes by about 0.01 from one pixel to the next. A double warp at strength 4 and frequency 0.6 changes by 0.26, twenty times rougher, and it reads as static. Lower the strength or the warp frequency, or give the warp field fewer octaves.
- Picking thresholds from the theoretical range: dividing fBm by
maxValuekeeps it within −1..1, but values cluster around 0. With 4 octaves, 90% of samples land between −0.47 and +0.47, so a threshold at 0.6 almost never fires. Thresholds you tuned with 1 octave also drift when you add more. Pick them from what you measure, like the dots in Lab #3. - Seams between chunks: if each chunk normalizes its own min and max, seeds its own noise, or uses chunk-local coordinates, the edges won’t match. Always sample in world coordinates with one world seed, and never normalize per chunk. For Voronoi regions in an endless world, generate sites per grid cell from the cell’s coordinates, so neighboring chunks agree on them.
- Banding: smooth noise squeezed into a few colors, or into an 8-bit height map, turns slopes into stair-steps. Keep heights as floats until the very end, and blend biome colors near borders instead of switching hard.
- Assuming floats match across languages: our JavaScript and C# produce bit-identical worlds. C++ did too, but only after we built it with
-ffp-contract=off. Without that flag, Clang on Apple Silicon fuseda * b + cinto single fused multiply-add (FMA) instructions, and the last digits of some values changed. In our tests, every biome still matched. If you need lockstep multiplayer or shared seeds across platforms, test on every target.
Real Games That Use These Techniques
- Hytale: terrain is a graph of density nodes, including
SimplexNoise2DandSimplexNoise3D(both output −1..1),PositionsCellNoise, three kinds of warp (GradientWarp,FastGradientWarp,VectorWarp),Clamp,SmoothClampandMix. That’s according to Hypixel’s own world-generation docs. The game entered early access on January 13, 2026. More on Hytale’s biome tiles, edge blending and prop grids in How Hytale Generates Its Worlds. - Minecraft (Java Edition): since 1.18 (Caves & Cliffs: Part II, 2021), overworld biomes are chosen from six parameters: temperature, humidity (also called vegetation), continentalness, erosion, weirdness and depth. Each biome claims a box in that six-dimensional space, and the closest one wins. Temperature and humidity only pick the biome, while continentalness, erosion and weirdness also shape the terrain. Mojang’s September 2026 notes for the 26.4 snapshots still describe “multi-noise biome sources.” Our two-parameter table is the 2D version of the same idea.
- Dwarf Fortress: world generation seeds base fields along a grid (elevation, rainfall, temperature, drainage, volcanism and wildness), derives vegetation from them, and then carves out biome regions, according to Tarn Adams’s description quoted on the Dwarf Fortress Wiki.
Extensions and Variations
- Endless worlds: replace
makeSiteswith one jittered site per grid cell, seeded by the cell’s coordinates. Any chunk can then find its neighbors’ sites without generating the whole map. - Rain shadows: walk moisture across the map in the wind direction, and let mountains wring it out. Their far side turns to desert.
- More climate axes: add a continentalness field (distance from the coast) or an erosion field, like Minecraft does, and pick biomes by nearest point instead of by table.
- 3D density: switch to 3D Simplex noise, treat positive density as rock, and you get overhangs, arches and caves. Our cellular automata tutorial can roughen the caves afterward.
- Biome-aware placement: scatter trees, rocks and loot with different spacing per biome. That’s the next tutorial in this series.
- Erosion: run water over the height map to carve rivers and valleys. It’s planned as the capstone of the Procedural World series.
Final Thoughts
Biomes are where noise starts to feel like geography. None of the parts is complicated on its own: a three-corner noise function, a warp, two more noise layers, a lookup table, and a nearest-point search. The craft is in the order you stack them and the thresholds you pick, and now you can see every layer while you tune it.
The same seed gives the same world in all three languages, so you can prototype in the browser and ship in Unity or Unreal without your map changing under you.
Next steps: this is part three of our Procedural World series. If you haven’t yet, start with Perlin noise and Voronoi diagrams, and for underground levels, cellular automata caves. Up next: Poisson-disk sampling, to fill these biomes with forests, rocks and loot that never overlap.
What would you add to the density stack? Tell us in the comments.
Further Learning
- Simplex noise demystified (Stefan Gustavson, 2005): the clearest walkthrough of Perlin’s algorithm, with reference code
- Domain Warping (Inigo Quilez)
- Making maps with noise functions (Red Blob Games): elevation, moisture and a Whittaker-style biome table, with interactive demos
- Density Generation Concepts (Hypixel’s official Hytale docs)
- World generation (Minecraft Wiki): how the six biome parameters fit together
This Post Has 0 Comments